
Parts List
There are many parts and components to a laser cutter, and it is important that you know some of the basics required to begin cutting. Following are several of the key components you will be using along with a description of their functions.
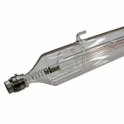
The Laser Tube - The laser tube is the heart of the machine, and as such is by far the most expensive component on the machine. This is the part that generates the laser used to cut and engrave material. It is housed in a locked cabinet in the back of the machine. It converts electricity into a high powered beam of infrared light, which reflects through a series of mirrors down the laser head and through the collecting lens to your material. Our machine has a 120w CO2 water cooled laser tube, capable of cutting a wide array of materials. *Never touch the laser tube with your bare hands!
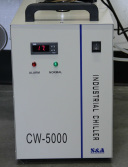
The Water Chiller - The water chiller is a device that has the job or circulating cool water through the laser tube as its cutting so that the glass that makes up the tube does not crack. As the laser tube generates laser pulses, it creates a lot of heat, specifically when it is cutting for longer durations of time. The water chiller works much like the radiator in your car, ensuring that everything stays at a nice comfy temperature. *The laser will not fire with out the water chiller running.
The Mirrors - The laser tube is located in the back of the machine and spans the majority of the width of it. As such, the beam must be directed to the work piece. This is accomplished through a series of 3 highly reflective mirrors positioned in the machine that direct the laser beam to the laser head and through the focus lens to cut material. In order for the machine to work correctly it is important that these 3 mirrors are in perfect alignment with each other and remain as clean as possible. As such it is important to take care not to bump or touch the housings that hold the mirrors. *If you do happen to bump one, DO NOT USE THE MACHINE, until we can insure that the mirrors are still in alignments, as this can cause damage to various parts.
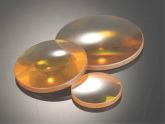
The Focus Lenses - The lens' job is to focus the high energy laser beam into a very small area in order to cut and engrave material. Much like starting a fire using a magnifying glass, the lens concentrates the energy from the laser to a small point. The focus lens is housed inside the laser head, and much like the mirrors it is very important that it remains clean and is positioned correctly. *Positioning of the lens is covered in the "Preparing to Cut" section of the training. We currently have 3 different lenses used for various jobs; 1.5", 2.5" and 5". The majority of the cutting and engraving will be done with the 2.5" lens. The other 2 are used for very fine engraving and cutting very thick material. *If you need to use a different lens, please contact me and I will show you how to change them out.
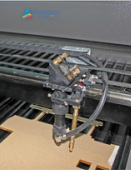
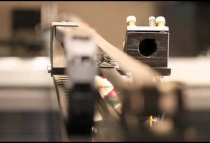
The laser head - The laser head travels along the x/y-axis gantry and houses the 3rd mirror as well as the collecting lens. This is the portion of the laser that moves along as you cut or engrave material. It also is where the end of the compressor line blows air to keep smoke and resins from settling on the lens. This is the portion of the machine, which you will be precisely aligning prior to cutting or engraving your material. *Aligning the laser head is covered in the "Preparing to Cut" section of the training.
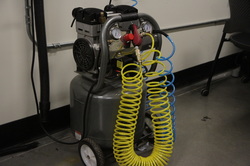
The compressor - The compressor's job is to generate a stream of air which blows across the lens as the the laser is cutting. The stream of air simultaneously cools the lens and helps to keep it clean. When a laser cuts or engraves, it is actually vaporizing the material (turning it from a solid to a gas). Many materials, particularly woods contain a lot of resins which will stick to things when they become vaporized. This includes components such as the mirrors and collecting lens. If these become obstructed this will cause the laser not to function properly, resulting in poor cutting/engraving. *The air flow from the compressor to the machine is controlled using the on/off valve on the wall next to the computer station.
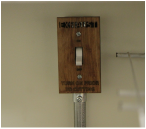
The blower and exhaust - As previously mentioned, a laser cutter works by using a high powered infrared beam to vaporize materials. This generates a lot of gasses and smoke, which we don't want filling up the room. The blower acts as a giant vacuum to suck all of these gasses out of the machine and exhaust them outside of the building. *The blower is turned on using the switch located on the wall adjacent to the control panel of the machine.
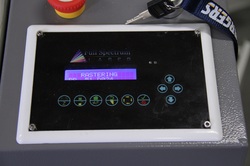
The control panel - The control panel is located on the front right corner of the machine, and is primarily used for adjusting and tuning the laser. The majority of the alignment you will be doing will be done from the computer using the print driver. There are some exceptions to this, but as a general rule of thumb, you will not need to use this panel.
The Computer/Software - The computer is the "brain" of the laser cutter. This is the part of the machine you will be interacting with the most. In fact, 90% of learning to use the laser cutter revolves around learning to use the software. The use of the software and print driver will be covered in the various sections of the training.